Shape Tools are designed to create and edit vector shapes and paths that are displayed in the Paths panel.
You can edit shapes using the following tools:
Add Anchor Point Tool  .
.
Delete Anchor Point Tool  .
.
Convert Point Tool  .
.
Path Selection Tool  .
.
Direct Selection Tool  .
.
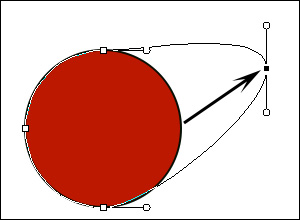 Moving an Anchor Point
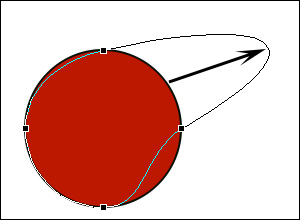 Moving a Segment
The selected anchor points are highlighted with color, they can be moved or deleted. You can select multiple anchor points using the mouse, holding down the Shift key or by selecting them with a frame. You can also move the selected points using the arrow keys in 1-pixel increments, or by holding down the Shift key - in 10-pixel increments.
Anchor points can be of two types: smooth point and angled; and they are edited differently.
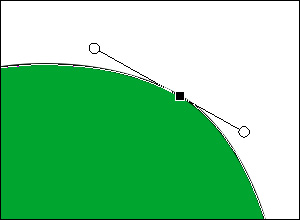 Smooth Anchor Point
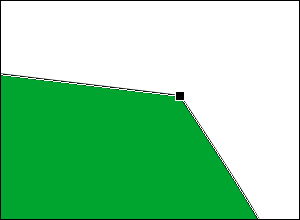 Angled Anchor Point
You can move angled anchor points with the mouse cursor. When moving smooth anchor points, you can not only drag them with the cursor, but also change adjacent segments using two direction lines. To change the length and direction of the direction lines, adjust round marks located on their ends. Increasing the length of the direction line increases the curvature of the adjacent curve.
The direction of both vectors of the selected smooth point changes simultaneously. Hold down the Shift key to edit the direction in multiples of 45°. Hold down the Alt key to change the direction and size of each vector line separately.
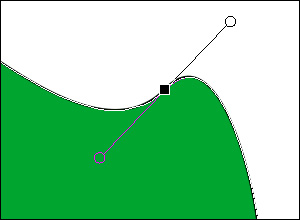 Simultaneous Adjustment
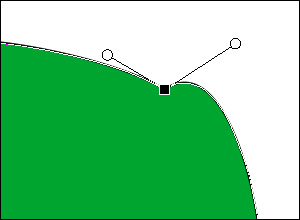 Separate Adjustment
Editing Options:
Auto Select. The check-box activates the mode of automatic switching to the vector layer by clicking a shape.
Convert to Smooth Point  . Click to convert the selected angled points to smooth ones.
Convert to Angled Point  . Click to convert the selected smooth points to angled ones.
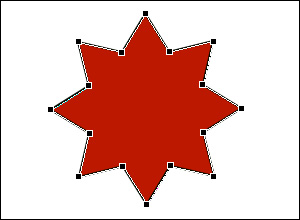 Sharp Angles
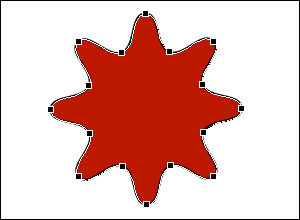 Smoothed Angles
