The Text tool  allows you to add text to an image. The hotkey for the tool is T.
Drag the cursor while holding left mouse button - the bounding box will appear where you can enter text. You can change the size of the box by dragging the markers on the frame. Hold down Shift to constrain the proportions. To move the block, place the cursor outside  and drag.
Alternatively, you can add text by clicking with the tool on an image, just start typing. In this case, text lines are not limited in length.
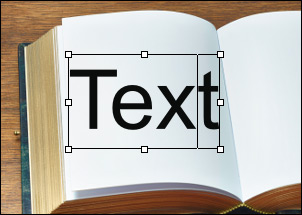 Adding a Text Block
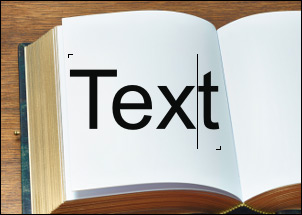 Free Typing
The basic tool settings are shown in the Tool Options panel above the Image Window. To display the full list of parameters, click the tool's icon in the Tool Options (top) panel or use F5.
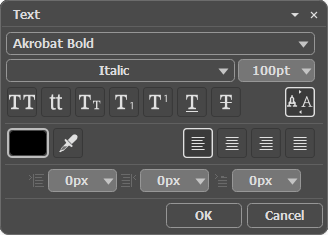 Text Parameters
Character Tab:
Font Family. The drop-down list contains a set of system fonts that can be used when typing.
Style. The list contains different variations of the chosen font.
Font Size (1-1500). The parameter sets the size of the characters (in points).
Text Settings:
 - ALL UPPERCASE
 - all lowercase
 - Capitalize (All Initial Caps)
 - Subscript
 - Superscript
 - Underline
 - Strikethrough
Color. The current text color is shown on the color plate. Click the color plate to open the Select Color dialog box where you can specify the color of the text. You can sample color directly from the image with the Eyedropper tool. Also, the color of the text can be set using the Color, Swatches, or Color Wheel panels.
Intervals:
 - Tracking (Letter Spacing). It's the distance between characters within a word.
 - Leading (Line Height). It's the distance between lines of text.
The button  calls up the Wrap Text parameters.
Paragraph Tab:
Alignment Options:
 - Align Left
 - Align Center
 - Align Right
 - Justify
Margin Options. You can adjust the indent width in pixels in the input fields.
 - Indent First Line
 - Left Margin
 - Right Margin
 - Space Before Paragraph
 - Space After Paragraph
Note: You can open the text formatting options panel by double-clicking the thumbnail of the text layer in the Layers panel.
The text automatically appears on a special text layer. You can convert this layer to a raster one with the Rasterize Layer command.
You can make a vector path from a text layer using the Create Path from Text command (the context menu of the Layers panel). Each character will become a separate shape segment.
The text layer can also be converted to the shape layer using the Convert to Vector Shape command. After vectorization, each character will be represented as a separate vector shape.
If the vector symbol consists of several separate parts, you can select and move each part with the Path Selection Tool  .
.
After rasterization/vectorization of text, you couldn't change or re-format it.
Right-click text to open a context menu with standard commands:
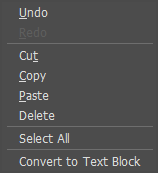
Undo. The command lets you undo a last change. The hotkey is Ctrl+Z.
Redo. The command lets you reapply a previously undone change. The hotkey is Ctrl+Y.
Cut. The command removes the selected fragment while taking it to a clipboard. The hotkey is Ctrl+X.
Copy. The command duplicates the selected fragment to the clipboard. The hotkey is Ctrl+C.
Paste. The command lets inserting data from the clipboard. The hotkey is Ctrl+V.
Delete. The command removes the selected fragment without saving it to the clipboard. The hotkey is Delete.
Select All. The command selects entire text on this layer. The hotkey is Ctrl+A.
Convert to Text Block/Convert to Free Text. The command changes the type of text.
You can transform the text block using the Move tool  . The transformation parameters will appear in the Settings Panel if you click the frame.
It’s also possible to transform text with the pressed Ctrl-key. It is important to distinguish this mode from simple changing of the bounding box.
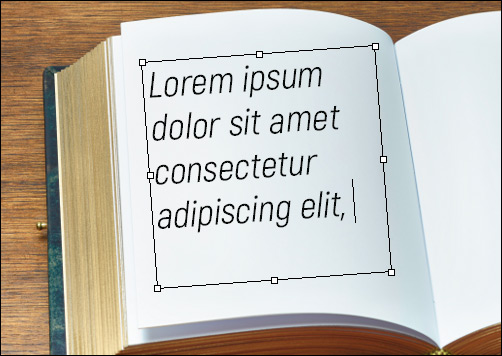 Transforming Text Block
To apply text press OK in the Settings Panel or select another tool in the Toolbar. To cancel click Cancel or use Esc.
