Eye-popping text effects make a difference. They can be used for various types of design projects, from print to digital, including logos, T-shirts, signage, signboards, and brochure designs. Learn how to create a multi-layered text effect on a custom background using the AliveColors image editor!
 Result
Creating a Background
Open the AliveColors image editor. Create a new image (File -> New... or Ctrl+N). In the Web group, select the Instagram | Profile Photo preset (180x180 px) and click ОК.
In the toolbar, select the Paint Bucket tool  and fill the background layer with dark gray: RGB(40,40,40).
Select the Color Brush tool  , select the Hard Round Brush in the preset list and set Size = 80. Create a new raster layer and draw a black circle in the center. For more accurate positioning, you can use guidelines.
In the Layers panel, click  and select the Inner Shadow layer effect in the drop-down list. Adjust the effect settings as follows:
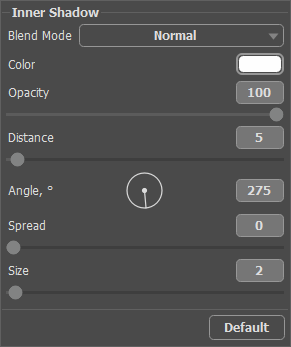 Inner Shadow
Save the resulting image as a texture. To do this, select the New Texture command in the Edit menu, enter any name and click ОК. Then you can close this document.
 New Texture
Create a new document (File -> New... or Ctrl+N). We selected 1280x1024 px preset from the Web group.
In the toolbar, select the Texture Brush  . Press the F5 hotkey to open the full parameter menu. Select the Hard Square Brush preset, find your texture in the Texture tab, set the Scale = 1% and enable on the Tile check-box. Set Size = 1300 px and fill the background layer with the selected texture.
Hint: If you wish, you can experiment with settings by changing the scale of the texture or the size and the angle of the brush.
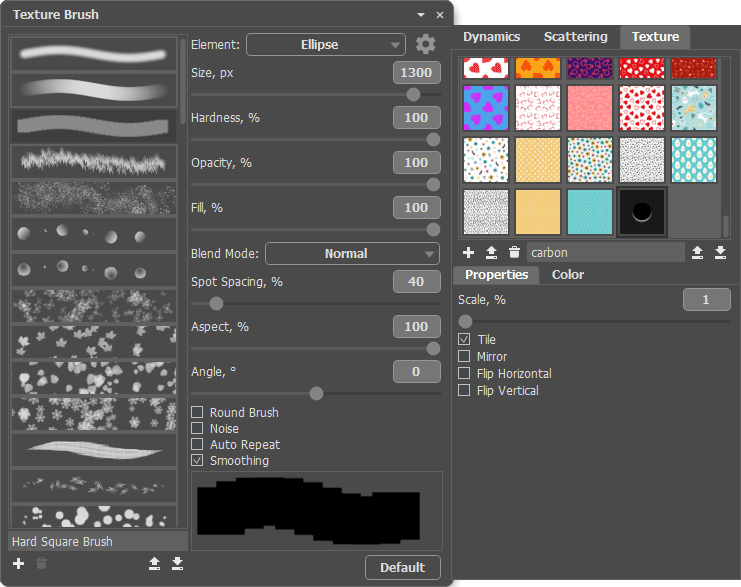 Texture Brush Settings
Creating Text Effect
Select the Text tool  , click the canvas, and insert some text. Adjust the text settings as follows:
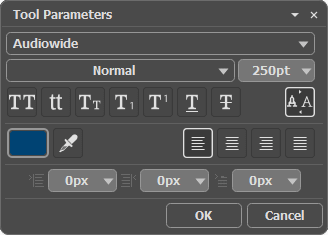 Text Settings
 Adding Text
In the Layers panel, click  and select the Stroke layer effect. Adjust the effect settings as follows:
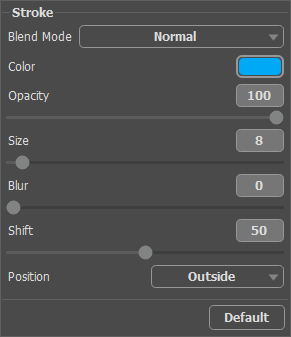 Stroke Settings
 First Stroke
Right-click the text layer to open the context menu and select the Duplicate... command. The layer will be duplicated along with the effect.
Select the original text layer, double-click the Stroke layer effect to open the settings panel. Change the stroke color and increase its width:
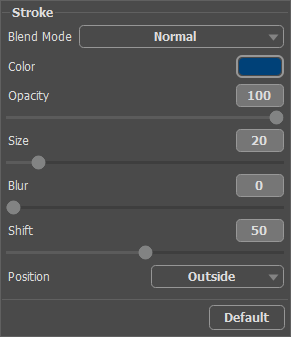 Stroke Settings
 Second Stroke
Duplicate the layer and select the lower text layer. Open the Stroke layer effect settings panel and adjust the parameters:
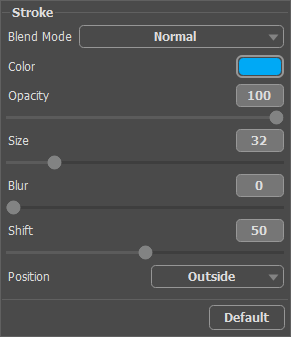 Stroke Settings
The number of strokes as well as their color may vary depending on the desired effect.
Here's the finished result:
 Result
