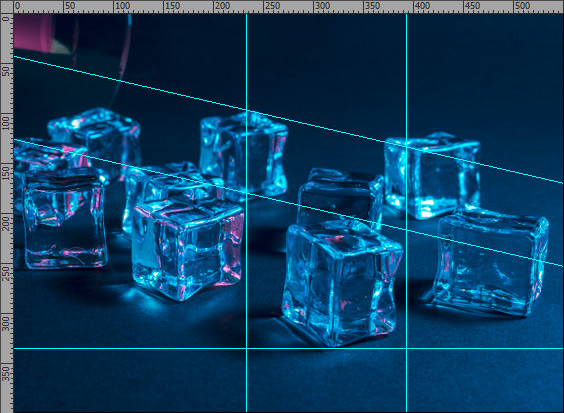
To make it easier to move and align objects (layers) and selected areas, use rulers and a grid with guidelines. The alignment lines are displayed only on the screen; you can turn them off at any time.
 Alignment Tools
To adjust the alignment settings, use the Workspace menu in the Control Panel:
Rulers. When this option is enabled, you can see the rulers along the edges of the Image Window. Right mouse clicking on a ruler lets you select the units of measurement (pixels, inches, centimeters, etc.).
Marks on the rulers indicate the position of the cursor.
To change the origin (zero), place the cursor over the intersection of the rulers in the upper left corner of the Image Window and drag diagonally to the desired point in the image. To restore the default origin, double-click this corner.
Grid. When this option is checked, the grid appears over the image. The grid’s point of origin depends on the rulers origin.
Pixel Grid. If this menu item is checked, a light grid outline is putted around each pixel once beyond 600% zoom level.
Guidelines... The command opens a dialog in which you can create, move, and delete guidelines.
Show Guidelines. If this menu item is checked, all guidelines will be shown in the image; otherwise, the lines are hidden. Hiding guidelines disables them and makes it impossible to align objects with them.
Lock Guidelines. This option prevents any accidental movement of guidelines.
Clear Guidelines. This command removes all guidelines.
Snap. This feature helps to precisely position the object which "clings", when moving, to the edge of a selected element. You can move objects within 5 pixels of the anchor point by rotating the mouse wheel while holding the left mouse button.
Snap to... In the drop-down list, specify elements to which to snap:
- Grid;
- Guidelines;
- Selection;
- Layers;
- Document.
Working with Guidelines:
To create a horizontal or vertical guideline, place a cursor over a corresponding ruler, and holding the left mouse button, drag a blue line.
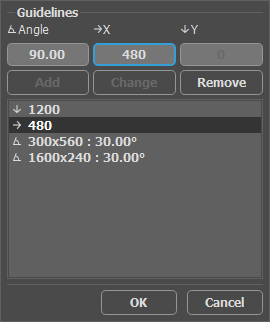
You can also create a guideline in the Guidelines dialog box. Call the dialog by selecting Workspace → Guidelines... or by pressing the button  in the Move tool's
  options.
In the X and Y fields, specify the position of the center of rotation of the guideline, and in the Angle field - the rotation angle. With an angle value of = 0o a horizontal guideline will be created, with a value of 90o a vertical guideline will be created. Click the Add button to add a guideline to the image.
 List of Guidelines
You can move the guidelines with the Move tool  . When you hover over a guideline, these controls appear:
Round markers are used to rotate the guideline. When you hover over them, the cursor will change to  . If you hold down the left mouse button and move the cursor, the guideline will rotate around the center. You can move the center of rotation along the guideline using the mouse.
Square markers at the ends of the line allow you to adjust the tilt of the guideline. When you hover over them, the cursor will change to  . Hold down the left mouse button and move the cursor to change the tilt angle of the guideline.
When you hover over a line, the cursor will appear  and the guideline can be moved. When you hold down the Ctrl key, the guideline will move in 10 pixel increments.
To create a copy of a guideline, hold down the Shift+Alt keys while moving it.
You can also change the position of the guideline in the Guidelines dialog box. Select the line in the list, set new values in the X, Y, and Angle fields, and click the Change button.
To remove a guideline, drag it outside the Image Window or select it from the list and click the Delete button.
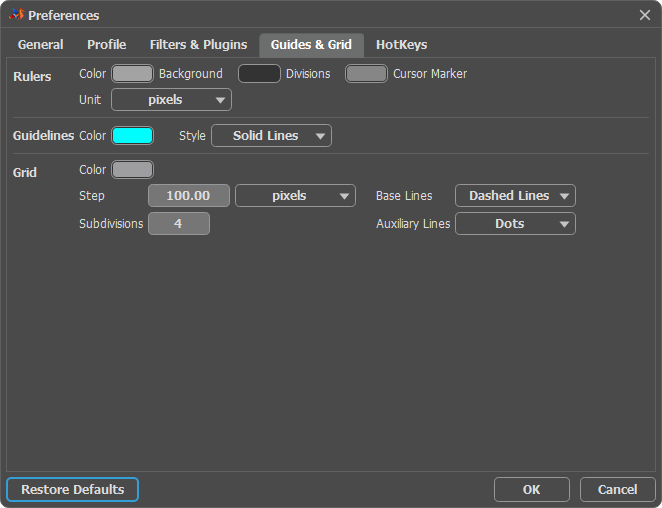
Click  in the upper right corner of the program window or select File → Preferences... to open the Preferences dialog box. Switch to the Guides & Grid tab to adjust rulers, guidelines, and grids.

