Using the impressive features of AliveColors, you can create spectacular images from scratch. This tutorial shows how to create a bookshelf themed desktop wallpaper. Also, you can create a phone wallpaper or a social media cover.
 Bookshelf Wallpaper
Create a new document in the AliveColors image editor (File -> New... or Ctrl+N). If necessary, use the built-in presets for social media images (Web group).
Enable the Rulers option (Ctrl+R). Select the Move tool  in the toolbar and create several vertical guidelines at different distances from each other.
To create a guideline, hover the mouse cursor over the vertical ruler, hold down the left mouse button and slide it to the desired location in the document.
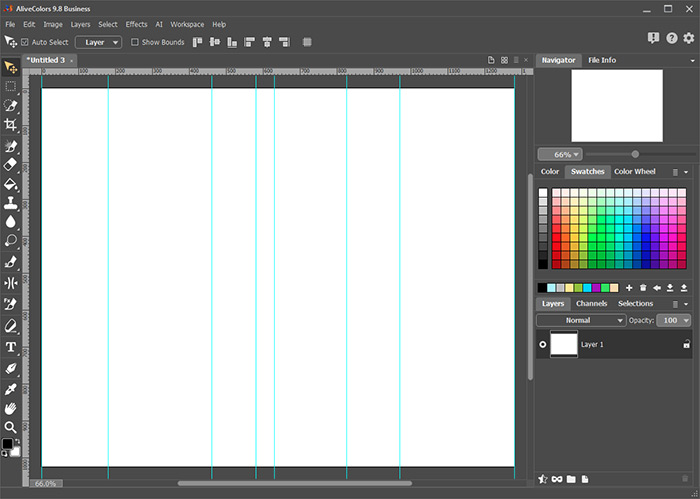 Creating Guidelines
Activate the Rectangular Selection tool  and select the area between two adjacent guide lines. Then activate the Paint Bucket tool
  and fill the selected area with any color.
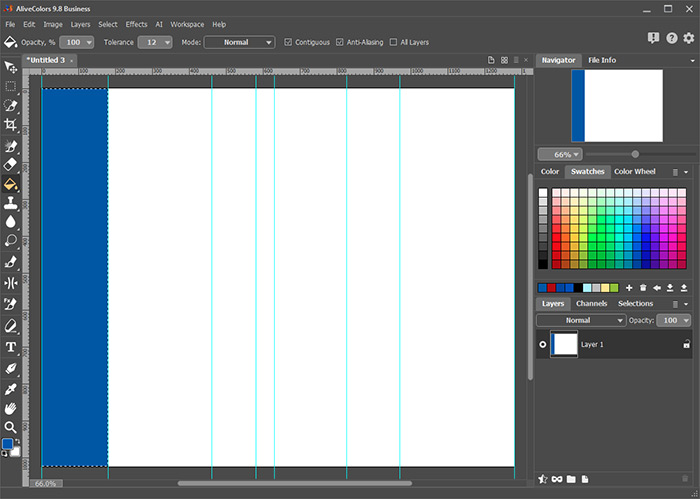 Color Filling
Activate the Gradient Fill tool  , select the Default gradient in the library and change the blending mode to Multiply. Apply a horizontal gradient to the selected area. Hold down the Shift key to keep the gradient line straight.
Process other areas of the document in the same way.
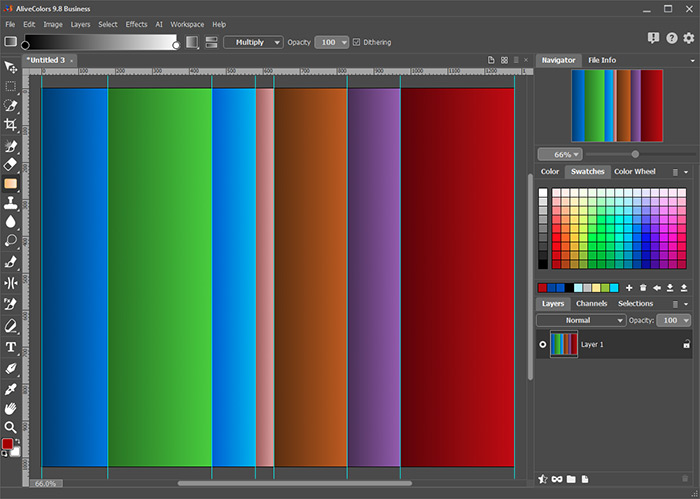 Gradients Added
Select the Darken tool  , reduce the Size to 10 pixels, reduce the Hardness to 90%, set the Range to Midtones and draw vertical lines along the border between adjacent gradients. To create a straight line, click the starting point, press the Shift key and then click the end point.
 Adding Volume
Add book titles. Select the Text tool  , adjust the settings and enter the name of a book.
 Title Added
Activate the Move tool  and use the Edit -> Transformation -> Rotate 90o CCW command to place the text over the image. If necessary, edit the text parameters: font, size, and color.
Open the list of layer effects by clicking on  in the Layers panel and select Deboss. Adjust the effect settings as follows:
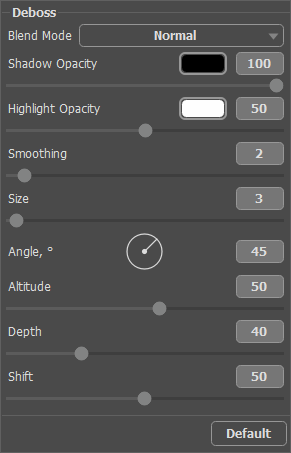 Deboss Effect Settings
 Book Spine
Add titles to other book spines.
 All Titles Added
If you wish, you can variegate the book spines by adding pictures and patterns.
 Result
