
AliveColors provides various photo editing tools. This example shows how to change an eye color to any color you like in just a few simple steps.
Also, you can use this method to change the color of other image areas like lips and nails.
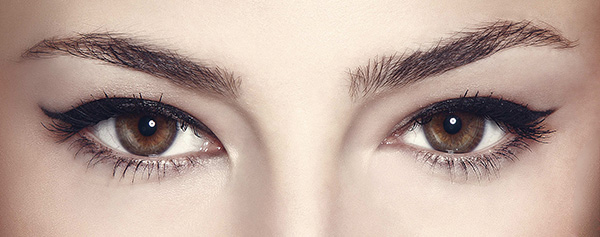

(mouse over to see the original image)
Open the image in AliveColors image editor.
Create a new Hue/Saturation adjustment layer above the background layer (Layers → New → Adjustment layer → Hue/Saturation).
 Layers Panel
Add a opaque layer mask to the adjustment layer (Layers → Layer Mask → Hide All).
 Creating a New Layer Mask
Go to the Layers panel and select the layer mask you just created. On the toolbar, select the Color Brush  with the Hard Round Brush preset. Select the white color using the Color, Color Wheel, or Swatches panel and paint over the iris of the eye.
Hint: If necessary, you can change the mask view mode in the Channels panel.
 Layer Mask Editing
 Mask View Mode
Option 1. Double-click the thumbnail of the Hue/Saturation layer to open the settings panel and adjust the eye color.
 Hue/Saturation Adjustment Layer Settings Panel
Change the blend mode of the adjustment layer to Hard Light to make the eyes brighter and clearer.
Experiment with different settings and get a new result each time.
 Color Variations
Option 2. Instead of the Hue/Saturation adjustment layer, use the Curves layer.
To change the color of the eyes, adjust the curves in separate color channels. For RGB space, these are Red, Green, and Blue.
To change the brightness or contrast of the resulting color, adjust of the curve in the combined RGB mode.
 Curves Adjustment Layer Settings Panel
 Result