The Crop tool ![]() allows cutting off an image that helps to remove unwanted areas, to improve focus, or to make a square from a rectangular or contrariwise. To quickly access the tool use C.
allows cutting off an image that helps to remove unwanted areas, to improve focus, or to make a square from a rectangular or contrariwise. To quickly access the tool use C.
You can also activate the Crop tool using the command Image -> Crop...
The Image -> Crop by Selection command allows you to quickly remove parts of an image surrounding the selection.
Activating the tool creates a crop frame that encloses the entire image. Select an area you want to keep by dragging the cursor while holding left mouse button.
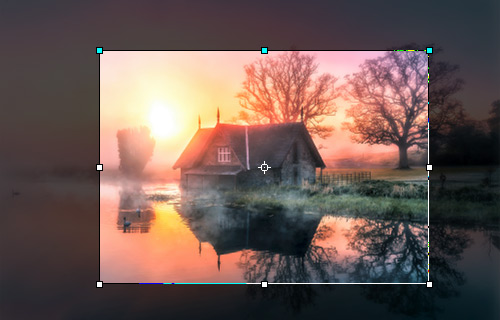 Crop Area
If there is an active selection on the image, the crop frame automatically appears around the selection area.
You can change the size of the area by dragging the markers on the sides and angles of the bounding frame. To constrain the proportions hold down Shift. To move the frame, place the cursor ![]() inside it and drag. If you move the cursor to the center point, it turns to an arrow with a circle
inside it and drag. If you move the cursor to the center point, it turns to an arrow with a circle ![]() : in this case, only the center is movable.
: in this case, only the center is movable.
To rotate the area, place the cursor ![]() outside the frame, and move it with the left mouse button. If you press Alt, the rotation angle will change in 5 degrees. The frame rotates around the transformation center.
outside the frame, and move it with the left mouse button. If you press Alt, the rotation angle will change in 5 degrees. The frame rotates around the transformation center.
Note: Blue markers on the bounding frame indicate where will be the top of the cropped image.
If the frame is beyond the image, the empty area will be filled with a transparent background.
The basic tool settings are shown in the Tool Options panel above the Image Window. To display the full list of parameters, press the tool icon ![]() in the Tool Options panel or F5-key.
in the Tool Options panel or F5-key.
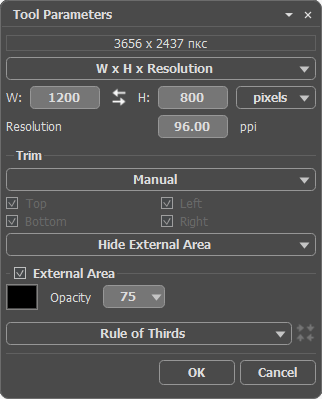 Crop Settings
You can choose between the crop modes: W x H x Resolution - an exact size, Freehand, Custom Ratio, Original, etc. - an aspect ratio.
W x H x Resolution. This option allows you to crop an image to a fixed size (in pixels, inches, mm, cm). The cropped image will be resized to the specified Width, Height, and Resolution.
Freehand. Enable this option to select the crop area by dragging the cursor over it.
Custom Ratio. This option allows you to crop an image to a specific ratio. Enter the desired horizontal and vertical aspect ratio in the Width and Height fields.
Original. Use this option to keep the original aspect ratio fixed.
Other items in the list allow you to choose one of the most common aspect ratios.
Click  to swap the Width and Height values of the crop area.
In the Trim section, specify the crop mode:
Manual. The crop area is created using the cursor.
Trim Alpha. The crop frame is created using the alpha channel's information.
Trim Selection. The crop frame is created using the selection channel's information.
Top Left Color. Areas having the same color as the upper left pixel in the image will be placed outside the crop frame.
Bottom Right Color. Areas having the same color as the lower right pixel in the image will be placed outside the crop frame.
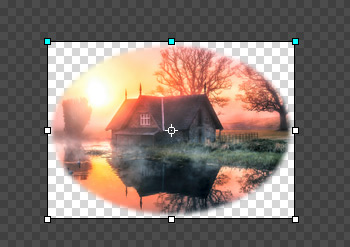 Trim Alpha
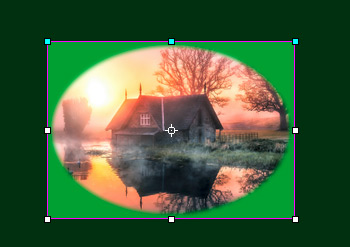 Top Left Color
You can select the side from where to crop the picture: Top, Bottom, Left, Right. This option is disabled for the selected Manual mode.
The tool can work in two modes:
Remove External Area. The areas outside of the bounding frame will be deleted.
Hide External Area. The areas outside of the frame will be hidden but still accessible. This mode lets you correct the cropped area later - you can move the visible part with the Move tool.
External Area. The check-box helps to better visualize areas in and outside of the crop frame. If the check-box is enabled, the outer parts are highlighted in a selected color.
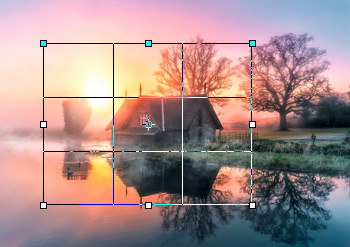 Check-box is Disabled
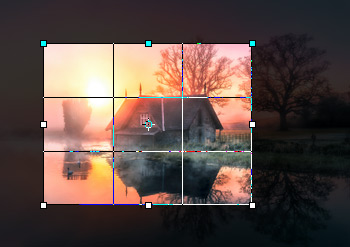 Check-box is Enabled
Adjust the visualization options for the external area:
Color. Click the color square to open the Select Color dialog box.
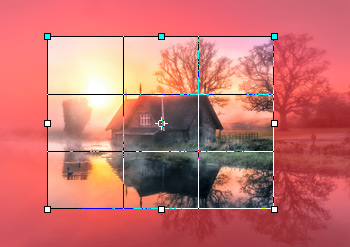 Using Red Color
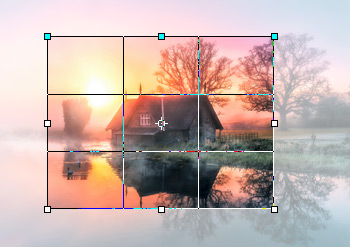 Using White Color
Opacity (1-100). The parameter defines the transparency of the highlight color.
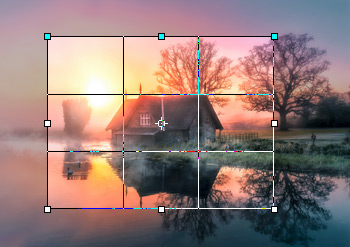 Opacity = 25
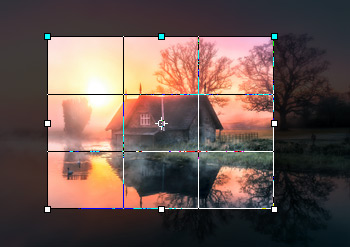 Opacity = 75
Grid  . In the drop-down menu, select one of the display options grid that helps when building an image composition or aligning frame boundaries. You can switch the grid view using the O key.
For the Triangle and Golden Spiral grids, the Cycle Orientation button is active ![]() . It allows you to mirror and rotate the grid. You can also flip the grid using the Shift+O key combination.
. It allows you to mirror and rotate the grid. You can also flip the grid using the Shift+O key combination.
To apply the tool and remove the areas outside the frame, click OK or press Enter. To cancel the crop, press Cancel or use the Esc-key.
