AliveColors supports the Batch Processing feature that lets you automatically apply the same settings to a series of images and save you time and effort. Batch processing does not block the program interface, so you can simultaneously edit other images. Watch the video tutorial on how to automatically process multiple images.
Even if you have never used this feature before, you will find no difficulties in using it. Just create an Action and apply it to a folder full of images.
Note: Not all commands can be recorded in an action.
Follow the instructions:
Step 1. Create two new folders, for example: "Source Files" and "Result Files". Place original images into the "Source Files" folder. The results will be saved in the "Result Files" folder.
Step 2. Open one of the original images in AliveColors. We will use this photo to adjust the parameters and create an action.
 Original Image
Step 3. In the Actions panel, click Create New Set button ![]() . Enter a name for a new set of actions, for example, "Sample". You can edit the name by double-clicking on it.
. Enter a name for a new set of actions, for example, "Sample". You can edit the name by double-clicking on it.
If you already have a set for the actions, you can select it.
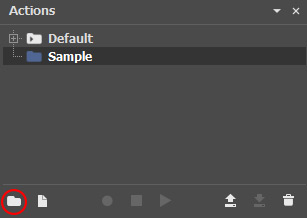 Actions Panel
Step 4. Press Create New Action ![]() and enter a name, for example, "Resize".
and enter a name, for example, "Resize".
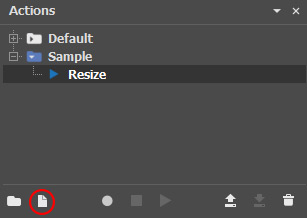 New Action
Press the Record button ![]() to run the recording of the action.
to run the recording of the action.
Step 5. Perform the operations and commands you want to record. For example, call the Resize Image dialog box (Image -> Image Size) and adjust the settings.
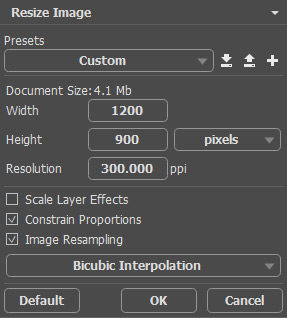 Image Resizing Dialog Box
Click the OK button. The resized image appears in the editor's window.
Step 6. Stop the recording by pressing Stop ![]() in the Actions panel.
in the Actions panel.
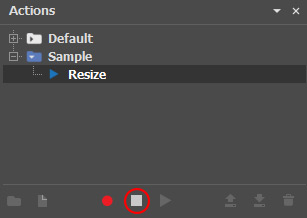 Action recording is stopped
Step 7. The action is created and you can start the batch processing. In the File menu, choose Automate -> Batch Processing and set the parameters.
In the Source Folder field, choose the folder which contains the photos to be processed.
In the Target Folder, choose the folder where the processed files will be saved.
You can check Include Subfolders to process all images in all subfolders of the selected folder (keeping the structure).
In the Save As list, select a file format.
In the Save RAW As list, select a format for saving RAW files.
Click  to call up a dialog box where you can configure the saving options for the selected file format.
In the File Name field, specify the names of the output files:
Source Name - the processed files will be saved with their original names.
Add Suffix - the specified character set will be added to the original names.
New Name - the names of all files will be replaced with the specified name with the addition of a sequence number.
In the actions list, select the "Sample" group and then the "Resize" action.
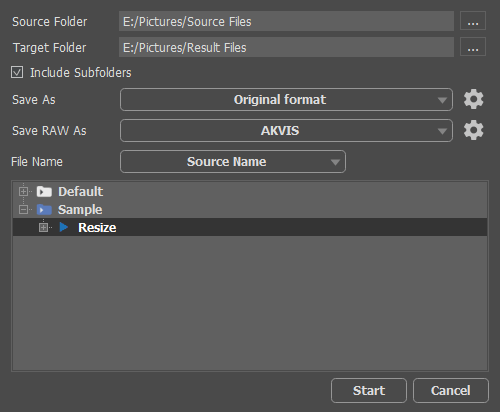 Batch Processing Tab
Step 8. Press Start to run the processing. AliveColors processes all the photos in the "Source Files" folder and then saves them to the "Result Files" folder.
To interrupt the process, close the Batch Processing tab.
